How To
How To Split Screen On iPad: Boost Your Productivity With Multitasking
Introduction: Embrace the Power of Multitasking
Welcome to the world of multitasking on your iPad! If you’re looking to boost your productivity and make the most out of your device, learning how to split screen on iPad is a game-changer.
Gone are the days of switching between apps and losing your train of thought.
With the split screen feature, you can now work on multiple apps simultaneously, side by side.
In this comprehensive guide, we’ll walk you through the process of splitting the screen on your iPad, along with some handy tips to help you make the most of this versatile feature.
How to Split Screen on iPad: A Step-by-Step Guide
Let’s dive into the step-by-step process of splitting the screen on your iPad. Whether you’re a student, professional, or simply an iPad enthusiast, mastering this feature will revolutionize your workflow.
Step 1: Open the First App
To begin, open the app you want to use as the primary app. This will be the app that takes up the majority of the screen space.
Step 2: Activate the Dock

Swipe up from the bottom of the screen to activate the Dock. The Dock is the bar that contains your frequently used apps.
Step 3: Find the Second App

In the Dock, locate the second app you want to use and tap and hold its icon.
Step 4: Drag the Second App to the Screen

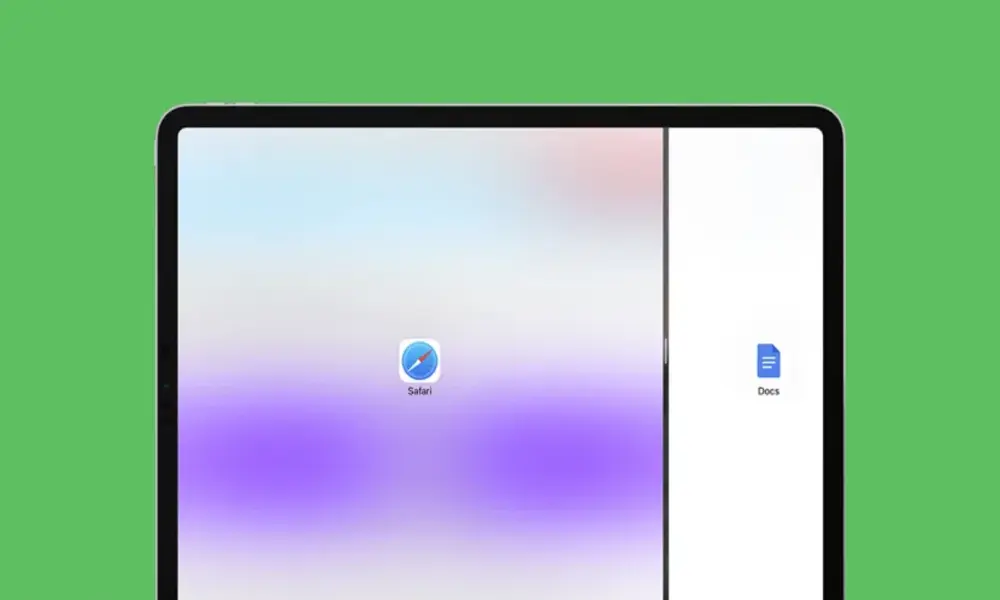
While still holding the app icon, drag it to the left or right edge of the screen. As you approach the edge, you’ll notice the screen splitting, and a black divider will appear.
Step 5: Adjust the Screen Split

Once the black divider appears, release your finger from the screen. You can now adjust the split between the two apps by dragging the divider left or right.
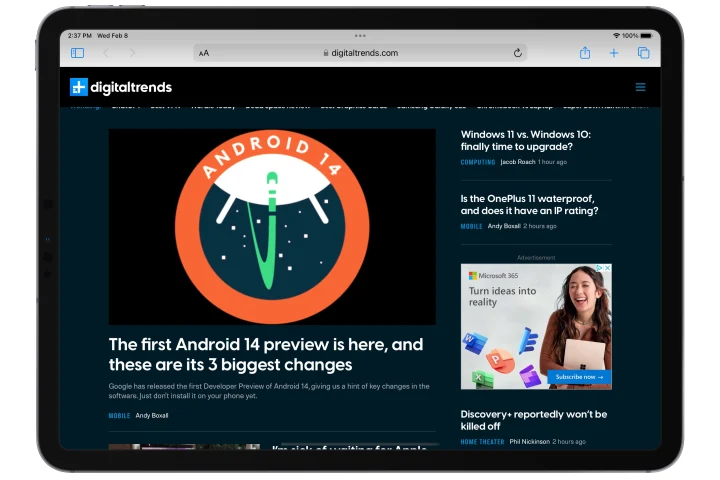
Step 6: Start Multitasking!

Congratulations! You have successfully split the screen on your iPad. Now you can use both apps simultaneously, allowing you to be more productive and efficient.
Tips for Enhancing Your Multitasking Experience
To maximize the benefits of split screen on your iPad and optimize your multitasking experience, consider the following tips:
- Organize Your Apps: Arrange your frequently used apps in the Dock for quick and easy access during split-screen mode. This saves you time and streamlines your workflow.
- Drag and Drop: Take advantage of the drag-and-drop feature to easily transfer text, images, and files between apps. Simply tap and hold the item you want to move, then drag it to the desired app.
- Adjust App Size: You can resize the app windows in split-screen mode. To do this, tap and hold the divider between the apps, then drag it left or right to adjust the size according to your preference.
- Switch Primary and Secondary Apps: If you want to make the app on the right side of the screen the primary app, simply swipe down on the black bar at the top of the screen. This will switch the app on the right to the left and vice versa.
- Use Slide Over: Slide Over is another multitasking feature that allows you to overlay a third app on top of the split-screen view. To activate Slide Over, swipe from the right edge of the screen and select the desired app from the Slide Over app picker.
- Use Picture in Picture: Picture in Picture (PiP) is a useful feature that allows you to continue watching videos or video calls in a small floating window while using other apps. To activate PiP, simply swipe up from the bottom of the screen while playing a video, and it will minimize into a small window that you can move around and resize.
- Customize App Pairings: iPadOS allows you to create and save app pairings for quick access to specific combinations of apps in split-screen mode. To create an app pairing, open both apps in split-screen mode, then swipe down on the black bar at the top of the screen and tap “Create Pair.” Give it a name, and the next time you want to use those apps together, you can quickly select the preconfigured pairing.
- Explore Multitasking Gestures: iPadOS offers a range of multitasking gestures to navigate between apps and access various features quickly. For instance, swipe up from the bottom of the screen with four fingers to access the App Switcher or swipe left or right with four fingers to switch between recently used apps. These gestures can save you time and make multitasking even more seamless.\
- Split Keyboard for Typing: If you frequently type on your iPad while using split-screen mode, you can enable the Split Keyboard option for easier and more comfortable typing. To activate it, open the on-screen keyboard and pinch the keyboard with two fingers, splitting it into two halves that can be moved closer to the edges of the screen.
- Experiment with Different Layoutslook: Don’t limit yourself to just a 50/50 split between apps. Depending on your preferences and tasks at hand, you can experiment with different layouts, such as a 70/30 split or even a three-way split, by adding Slide Over on top of a split-screen view. Find the layout that suits your needs and enhances your productivity.
Conclusion: Unlock Your iPad’s Multitasking Potential
Learning how to split screen on iPad opens up a whole new world of multitasking possibilities.
Whether you’re a student juggling research and note-taking, a professional managing emails and spreadsheets, or someone who wants to enhance their productivity, split screen mode on your iPad is a powerful tool.
Remember, with just a few simple steps, you can effortlessly enable split screen mode and work on two apps simultaneously.
Adjust the size of the split screen windows, switch their positions, and exit the mode whenever you need to.
So, embrace the power of multitasking on your iPad and make the most of your device’s capabilities. Boost your productivity, streamline your workflow, and conquer your tasks with ease.
RELATED CTN NEWS:
Add Me to Search: The Quick And Easy Way To Improve Your Online Discoverability
How To Concert Convert AVIF To PNG: 3 Tools Options For Conversion

How To
How to Choose the Right Dumpster for Your Concrete Project

Managing the resulting waste efficiently is crucial when undertaking a concrete project, whether it’s a home renovation, construction, or demolition. Proper disposal ensures compliance with local regulations and maintains a clean and safe worksite. One of the best solutions for managing concrete waste is renting a dumpster designed for heavy debris. But with various options available, how do you choose the right dumpster for your concrete project? This guide will help you navigate the selection process, ensuring you make the best choice for your needs. Simplifying project waste with concrete dumpsters is essential to this process, as it streamlines disposal and keeps your project site organized.
Understanding Your Project’s Scope
Again, the first consideration when selecting the right dumpster is the nature and size of the project. Think of the amount of concrete waste you anticipate producing in construction. Demolition may be minor, such as small patios or big construction projects, including the tearing down of buildings. Deciding what kind of debris you have will dictate the dumpster size you need to rent.
Dumpster Rental Size: How to Choose
Dumpsters are available in different sizes, typically expressed in cubic yardage. The available sizes for concrete projects are 10-yard, 20-yard, and 30-yard Concrete dumpster rentals. Each size is suited for different project scales:
- 10-Yard Dumpsters: These are perfect for small-scale projects, including minor excavation like removing a driveway, constructing a small seating area like a patio, or other minor home improvement tasks. They can contain up to 10 cubic yards of concrete, which means they can hold 3-4 pickup truck loads.
- 20-Yard Dumpsters: Ideal for moderately large projects like large driveway paving, extensive home construction remodeling, or small construction construction. These dumpsters are designed to hold about six to eight loads of pickups of concrete.
- 30-Yard Dumpsters: These are ideal for large constructions, massive reconstruction of structures or houses, and complete house wreckage. They can hold about nine to twelve pickup truckloads of heavy waste.
This is important because it will allow you to have enough capacity for the waste to not require you to call for a second or third haul, which will take a lot of your time and even cash.
Weight Restrictions & Load Laws
Concrete is quite an intense material; it is rather heavy and rather dense. When getting a dumpster on rent, one critical thing to consider is the restrictions on the weight of the dumpster. As a result, most rental companies have weight restrictions since they are easily affected by the load they carry and abide by the law on road safety. Due to this, overloading a dumpster can lead to extra charges on top of the bill or the company simply refusing to take the said container.
To prevent such challenges, it is advisable to estimate the weight of the concrete waste that one is going to dispose of. A cubic yard of concrete can thus measure approximately 27 cubic feet and may weigh about 4,000 pounds. These are some of the things that will assist you in picking the right dumpster to hold your project’s load securely.
Accessibility and Placement
One of the other important issues is its location on the territory of the enterprise or the house. Make sure that your site has adequate room for the delivery and installation of the container. The site should be easily reachable by delivery truck and oriented to allow efficient loading of concrete debris.
Think about what kind of ground and any barriers to putting the object at the selected location. A flat, rigid surface is the perfect condition to prevent the dumpster from moving or sinking into the ground. Moreover, one should ensure no potential overhead conflicts, such as tree branches or power lines, that may hinder delivery.
Duration of the Rental
The size of your project will also determine how long you will need the dumpster because some projects will require a shorter time than others. Rental periods differ; therefore, it is essential to ensure that the rental period of your choice is well-suited for the specific project in question. While some allow customers to extend the rental period, others will only supply vehicles that are rented for a shorter duration. An important thing to note is that most photo booths come with an additional fee for the number of hours of usage, so ensure that this is clear from your project’s timeline.
Comparing Rental Companies
There are differences in the services that the various dumpster rental companies provide or the amount of money they charge. When choosing a provider, it may be useful to look at factors such as reliability, clients’ support, and tariffs. Search for companies focusing on concrete waste management because they know the procedural measures for managing such dense materials.
General recommendations can be found based on the experience of other contractors or homeowners who have carried out similar work. A reliable service provider is expected to be transparent about their service offerings, especially regarding extra charges for oversized shipments or an additional day of equipment usage.
Environmental Considerations
Disposing of concrete waste does not only entail choosing the most convenient method; it is also a matter of ecology and the environment. Recycling of concrete debris is also expected since most rental companies offer Concrete Recycling Services whereby the debris is crushed and taken back to the site for construction or as aggregates in new concrete mixes. The ideal firm to hire for the job is one that understands the value of recycling and will work towards it.
Conclusion
To consider the best dumpster for a concrete project, one must take into account the following factors: the type and size of the project, the size of the dumpster required, the maximum allowed weight, size, and access to the site, the permitted period of use, and the environmental conditions. By adopting these aspects, waste management can be enhanced, guaranteeing the project’s success.
Project waste may be as complex as the projects themselves, which is why concrete dumpsters are efficient in simplification and add a new level to saving time and money while promoting a cleaner and safer working environment. Therefore, choose wisely and rent from a reliable company to benefit from the best results for your concrete work.
SEE ALSO: How Do You Unlock Personalised Content With the ZLibrary login?
How To
Increase Your Facebook Post Likes: A Step-by-Step Guide

A Facebook page and post need to get more likes for multiple benefits. For example, indicating the content’s quality to the audience and the algorithm, boosting brand credibility, and getting discovered by new customers. Purchasing fake likes on Facebook is never recommended as it can harm your reputation and result in negative consequences. Fortunately, you can increase your Facebook post likes organically without involving any risk.
Here is your step-by-step guide to get more likes and increase both page reach and engagement.
Understand your target audience
Before planning any Facebook strategy, it is important to understand who your target audience is and what sort of content they want to see on the platform. Once you know them, you can easily create posts that resonate with them and receive sufficient likes. It can also be the most useful tip when setting up targeting options for paid ad campaigns and achieving better ROI.
You can also find the Facebook Groups that your potential fans are most active. You don’t need to access the profile of each user to know them, instead, you can use analytics to find who your users are and what type of content they respond to the most. Using Meta Business Manager can provide you with free analytics. However, you can also use third-party analytics tools to access better and updated insights.
Join groups on Facebook
Actively participating in Facebook groups or communities where your potential users can be found can be the best strategy to drive more exposure on the platform. Find relevant groups that are related to your niche and interact with other members to receive more real likes. Moreover, you can directly promote your page based on the rules of the specific group. Therefore, check the rules before sharing any promotional content.
Post trending content
Uploading a post on a trending topic can get thousands of likes and other engagements as these posts are more likely to be shared by many people. Leveraging viral topics in your posts can provide your posts with exposure to millions of people and drive around thousands of real likes.
Users on Facebook are likely to share posts that make them laugh a lot with their family and friends and provide valuable information. Scientific research, motivational content, humorous stories, and riddles or puzzles are the most common types of content that more often trend on the platform.
Re-share trending content
Once you share viral content on your account, you can keep your audience engaged by re-sharing that particular post. When you can’t understand what fresh ideas you must create, you can re-share highly trending posts. Always remember that all content you are posting on Facebook doesn’t necessarily mean to be fully original. You can group out your content calendar by re-sharing current viral content that’s already proven to resonate with your audience.
Use visual content
Compared to normal text posts, photos and videos consume more space in Facebook’s feeds, so they are more visible. Also, they are more effective in attracting users and getting them to stop scrolling. Consequently, users tend to like, share, and comment on visual posts rather than simple text. Average video posts on Facebook have around a 0.26% engagement rate, which is higher than regular posts.
Host giveaways
Every person loves receiving free things that can be gained without any investment. So, giveaways can be the best way to attract an audience to your page and boost post likes on Facebook.
To run a giveaway, sign up for a trusted social media contest tool and then choose a prize and include entry methods. Never use direct CTAs as ‘like this’, instead, you can use ‘visit post’ as an entry action. It will bring more traffic to your posts or pages and may encourage users to like them anyway. Be sure that your contest meets all the applicable regulatory and legal requirements.
Take advantage of your website traffic
This can be one of the most effective ways to get more likes on your Facebook page. To take advantage of your website traffic, you can add your Facebook page feed to your website page. To make this process easier and faster, you can use the Facebook Feed Pro plugin that shows your page feed on a website within a few clicks. Traffic on Facebook can also enhanced by gaining photo likes.
Show your posts on the sidebar
You can display Facebook widgets on a website to get it seen by a large audience. By adding your Facebook feed on the sidebar of your website, you can show your Facebook page to as many users as possible, thereby increasing the chances of getting more likes on your page and posts. A Facebook Feed Pro can help you display your page posts on the sidebar within 5 minutes or less.
Post when your audience is online
To let your post immediately reach a large audience, it is the best tip to post content when your potential fans are online. 9 AM to 2 PM between Tuesday and Thursday is the best time to post on Facebook if you are marketing to related brands. However, if you are marketing directly to consumers, you can skyrocket your Facebook likes by posting content at noon from Monday to Wednesday because fans are most active on the platform at these times.
Remember, it is not guaranteed that these are the best times for all. To optimize your page engagement, understand when your page-specific audience is online. Use this information whenever you schedule a post to receive lots of likes and other forms of engagement from the target audience.
Make a ‘Like us on Facebook’ popup
Create your high-converting ‘Like us on Facebook’ popup using online tools to get more leads and page/post likes. Popups are highly beneficial in transforming website visitors into Facebook likes. Personalize the popup to meet specific conditions and let it appear when your visitor is just about to leave your site or has visited 2 or more website pages.
How To
Transform Your Home Top Simple Handyman Projects

Your house is your haven, and minor improvements can tremendously affect its comfort, usefulness, and beauty. Extensive renovations may seem overwhelming, but many easy handyman Richmond Hill projects can enhance your home without spending too much money or taking up much time.
Simple And Popular Handyman Projects
Let us discuss some of the best handyperson jobs to breathe new life into your living space.
1. A Fresh Layer Of Paint
Painting any room in your home is one of the most inexpensive ways to update and invigorate it. Choose a color scheme that matches your décor and personal style. Painting just one accent wall or giving an entire room a makeover can instantly lighten up and renew the space.
2. Updating Cabinet Hardware
Replacing old-fashioned cabinet hardware can give your kitchen or bathroom an updated look without doing an entire renovation. Select stylish knobs, handles, or pulls that go well with what you already have for cabinets and add both elegance and functionality to the area.
3. Installing Shelves
Adding shelving units or floating shelves is a great method of increasing storage and display space while also introducing visual interest into any given area within a house—be it the kitchen (cookware; spices), bathroom (toiletries; towels), or living room (books; décor items).
4. Upgrading Lighting Fixtures
Updating lighting fixtures alone can dramatically change a room’s atmosphere. Swap out those old-fashioned ones for newer models that save more energy while brightening up and improving the overall look throughout the house. Consider fitting dimmer switches for more versatility.
5. Boosting Curb Appeal
Do something about how people view your property from the outside by doing simple things like painting front doors, planting flowers near entrances/exits, fixing outdoor lights around paths/stairways leading up towards entrance doorways, replacing mailboxes, etcetera. These small changes will significantly affect first impressions made when people come over for visits.
6. Re-Caulking And Re-Grouting Bathroom Tiles
Bathroom caulk and grout can become discolored and worn out over time. Rejuvenate your bathrooms instantly by giving them a facelift with fresh caulking around sinks, tubs/showers, and re-grouting tiled surfaces, which will also help prevent water damage.
7. Organizing/Decluttering
A home without clutter feels more spacious and welcoming—Declutter every room, including closets, cabinets, and storage areas. Create streamlined living spaces by donating or discarding items no longer needed or useful within the household. Thus, you will create an environment where everything has its place, making it easier for people to find things when they need them most. This will also save you lots of time in the future.
8. Sealing Gaps/Cracks
Drafts or pests may get into the house through gaps/cracks around windows, doors, and walls; therefore, inspect these parts closely, then use weather-stripping, caulking, or foam sealant to seal these openings. This will also enhance energy efficiency throughout the dwelling while keeping it warm during winter months!
You don’t have to spend a fortune or do a total remodel to make your home look better. With these kinds of handyman in Scarborough improvements in place, you will be happier about returning after long days out and having an easier time relaxing with friends over on weekends.
People Also Reading:
Loan for Self Employed: Grow & Thrive
-

 News3 years ago
Let’s Know About Ultra High Net Worth Individual
-
Entertainment2 years ago
Mabelle Prior: The Voice of Hope, Resilience, and Diversity Inspiring Generations
-

 Health4 years ago
How Much Ivermectin Should You Take?
-

 Tech2 years ago
Top Forex Brokers of 2023: Reviews and Analysis for Successful Trading
-

 Lifestyles3 years ago
Aries Soulmate Signs
-

 Movies2 years ago
What Should I Do If Disney Plus Keeps Logging Me Out of TV?
-

 Health3 years ago
Can I Buy Ivermectin Without A Prescription in the USA?
-

 Learning3 years ago
Virtual Numbers: What Are They For?